Tuesday, September 20, 2011
Most gratuitous use of an Arduino
So, a while ago, i built a circuit to shut off our aquarium water filter when the bucket gets full (http://mhkaufman.blogspot.com/2010/01/rodi-auto-shutoff.html). About a month ago, my room mate managed to break it. So rather than going through the "hassle" of rebuilding it, I decided to take the easy way out and replace the whole thing with an arduino. All it does it does is open a solenoid valve and start power flowing to one pin. When it sees current in the other pin (which happens when both pins hit the surface of the water), it shuts the solenoid valve and stops power to the first pin. The only even slight improvement over the original non-arduino version is that once this version shuts off, it doesn't pass any more current through the water, which is nice because it limits the electricity-aided dissolution of metals from the probes into the water, which can be bad for the fish. It even looks exactly the same, a black box with a button and one blinking LED on it.
Wednesday, May 11, 2011
Power trim tabs
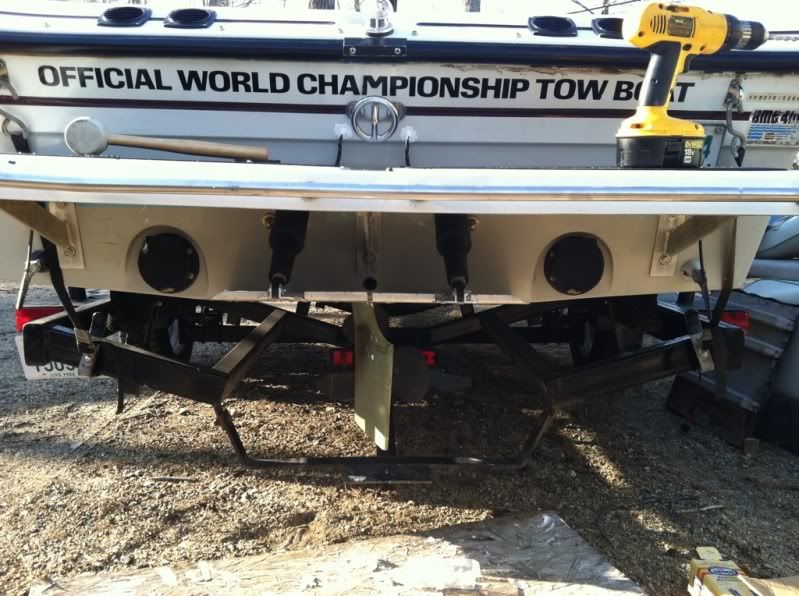
On the back of my boat, there's a wake plate. In stock form, it acts sort of like one big trim tab right in the middle of the boat. It has manual, turnbuckle-like adjusters, and no hinge. Hop in the water (or behind the trailer), tighten the adjusters, and the plate bends up. Loosen them and it bends down. you can sort of see it in this picture (it's edge-on, parallel to the bottom of the boat, between the exhaust ports. it's also bent in this picture):
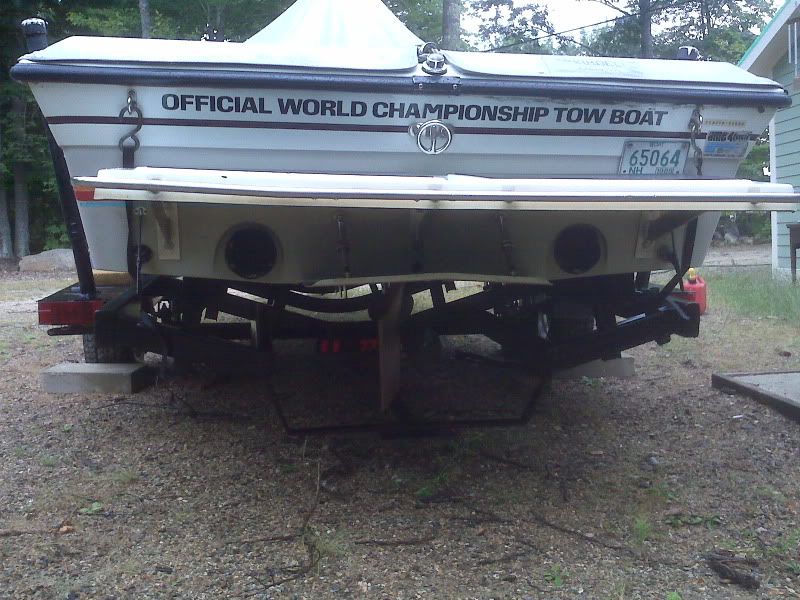
Anyway, the point of it is that if you bend it down, it pushes the back of the boat up, and makes the wake small for slalom skiing. If you bend it up, it pulls the back of the boat down and makes the wake big(er) for wakeboarding. I mostly wakeboard, so I generally leave it in the up position. The problem is, pulling the back of the boat down makes it unstable at speed. So around 30 mph it starts to porpoise pretty noticeably, and by 35 it's getting pretty rough. At 40 it's way bad, and pretty dangerous. So I never went much above 35mph last year.
This year I wanted the best of both worlds, so I bought some used lenco trim tab actuators off of ebay and set about figuring out a way to fit them. The actuators look like this:

Some problems presented themselves:
1: there is no hinge, and the power actuators have more travel than the stock manual adjusters. I was worried about stressing the plate mounting point.
2: there are 2 adjusters. Keeping them adjusted evenly in a manual setup isn't a problem, but with the power actuators, I was worried that due to the actuators running at slightly different speeds, even if I wired them to one switch, they might end up offset, and twist the plate, again stressing the mounting point. Also, having some independent side-to-side adjustment might mean i can trim the boat level despite uneven weight distribution, although the tabs will be very close together and near the center line, so this may not really work.
3: the power actuators are too long. The manual ones are about 7" long in the middle of their travel, while the power ones are around a foot (i have the lengths written down somewhere). The manual adjusters already mount pretty near the edge of the plate, and the end that mounts to the boat can't be moved higher, because it would interfere with the swim platform. So there are some geometry problems to overcome. There are other length actuators available, but the ones I am using are the standard-length lenco ones. They're very common, and about as cheap and available as possible, which is key.
4: I can't really weld aluminum. I can weld steel, but the existing plate is aluminum, and I like the light weight and corrosion resistance, so I don't really want to go to steel.
5: money. I could have paid a boat shop about $600 or so in parts, and another $6-800 in labor to just do this whole project for me (for a total of around $1200-1400). But my budget was closer to $2-300 total. So that was out.
The plan:
After spending an afternoon under the boat with all the parts, just test fitting things, holding things up where they might go, and generally puzzling things out, I figured that the only real way to make it work was to make some sort of extension arm to mount the actuators to. Here is a terrible paint drawing of what I'm talking about:
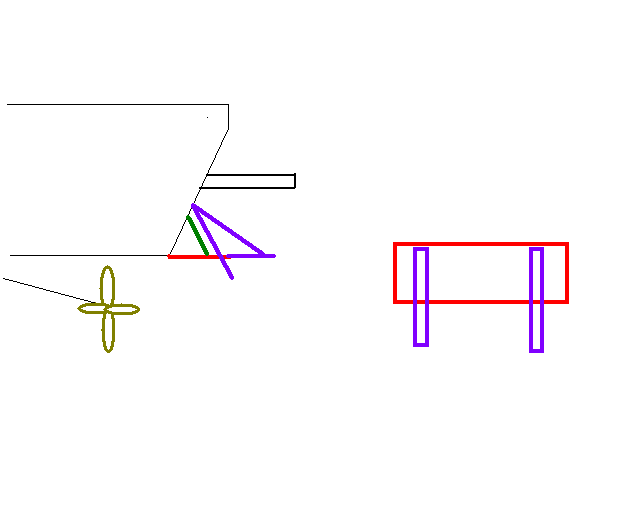
The plate is red. the old manual adjusters are green. the new power ones are purple, as are the proposed "extensions". The 2 major problems I foresee with this solution are 1: that the extensions will basically be dragging in the water, and they may create a lot of spray. And 2: that the geometry isn't ideal. Making the angle where the extension meets the actuator more acute puts more load on the actuator for any given pressure on the tab itself. I did no math, but I have seen these tabs on much larger boats than mine, so I am hoping they can handle it.
Finally, the fun part: Construction!
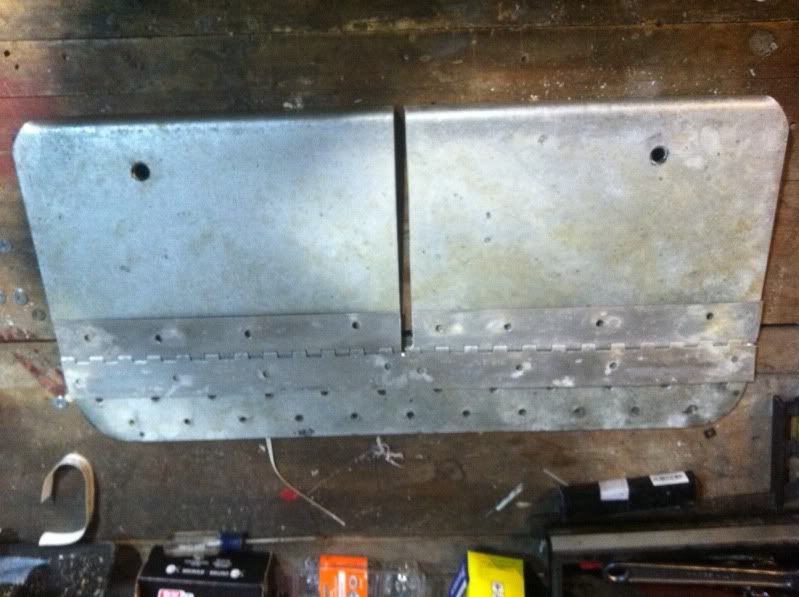
I pulled the plate off and cut it into 3 pieces:
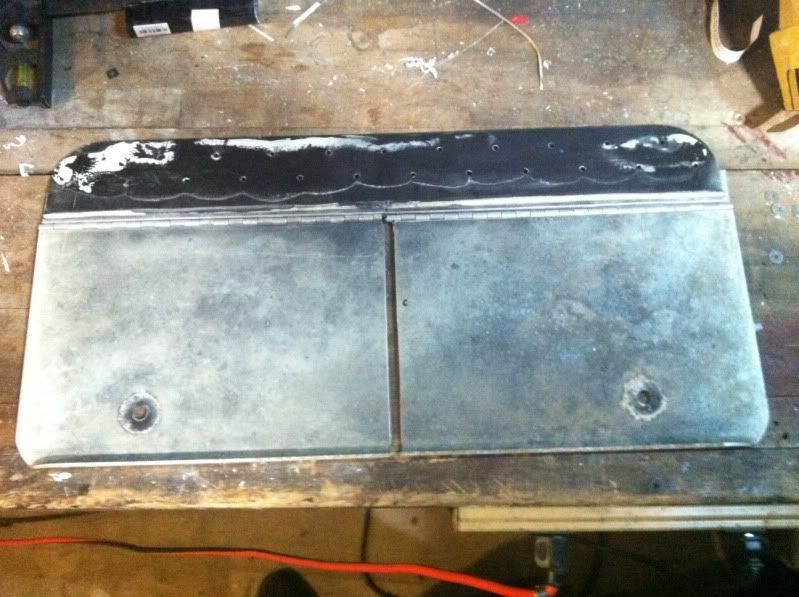
then I added some aluminum hinges I actually scavenged off another part of the boat:
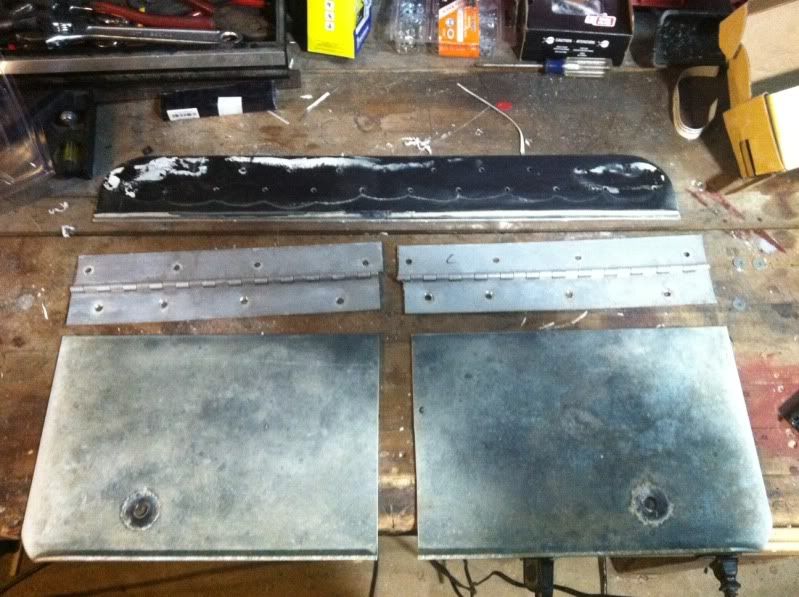
Then I picked up some aluminum angle bits at the local hardware store and made the extensions:
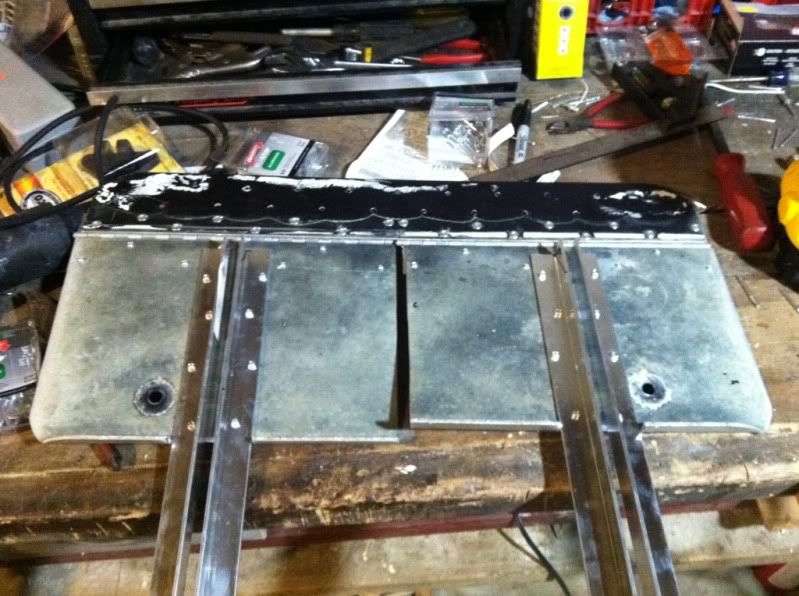
I decided to rivet everything together, because rivets are cheap, I can get them in aluminum to avoid corrosion issues, they have small heads which makes mounting the plate back on the boat simpler, and it seemed like a good idea. So that's what I did.
Here are a couple more pics of the more-or-less finished setup on my bench:
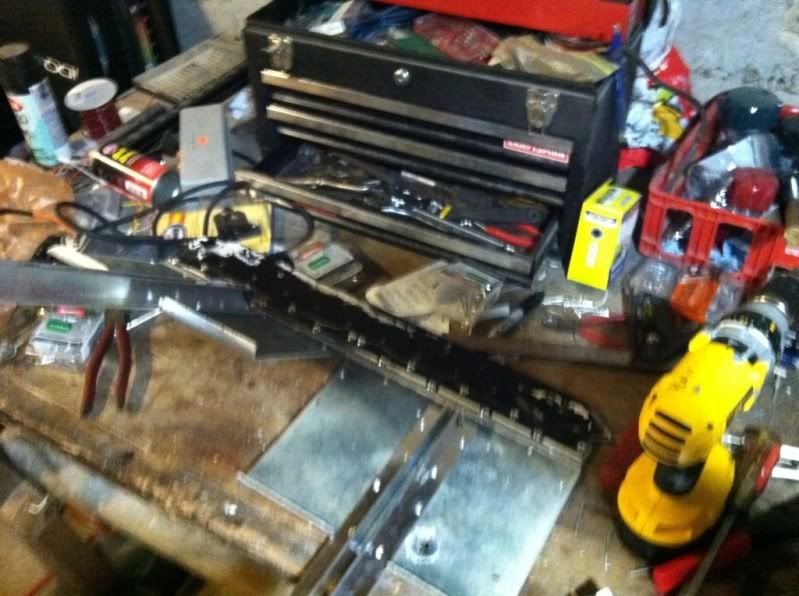
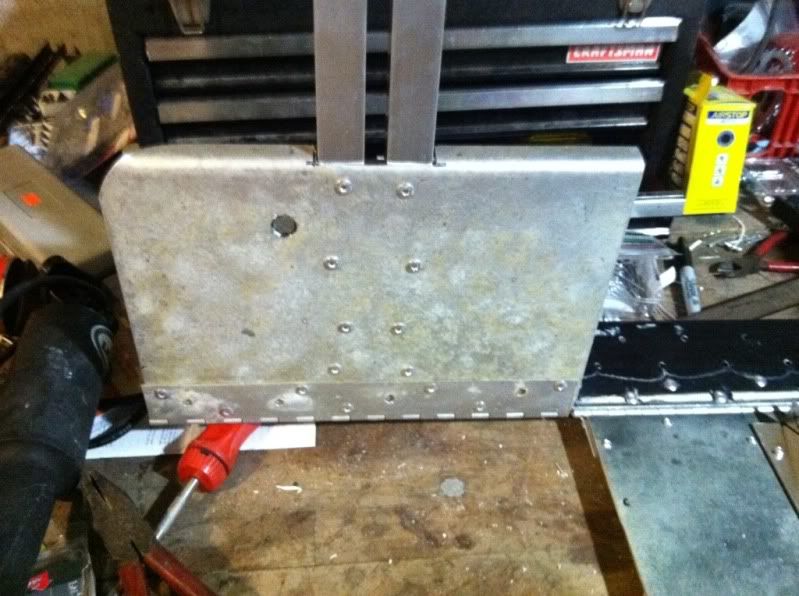
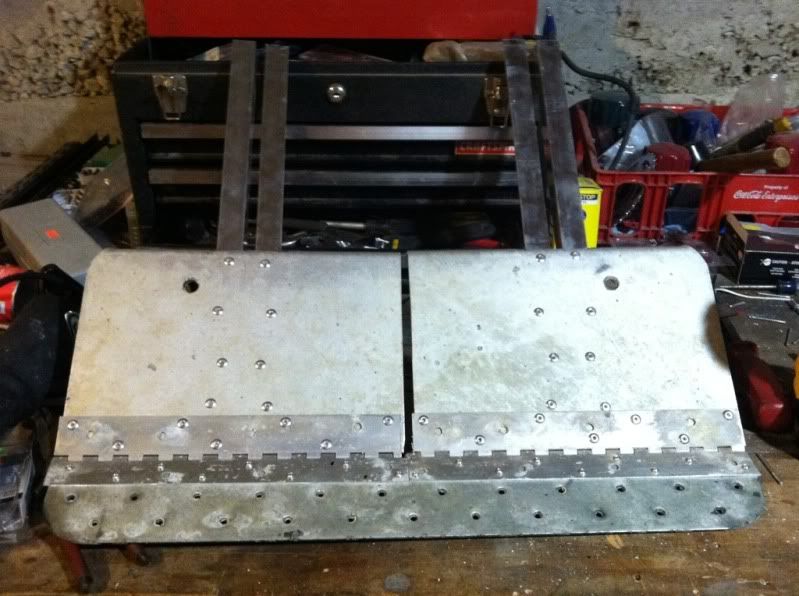
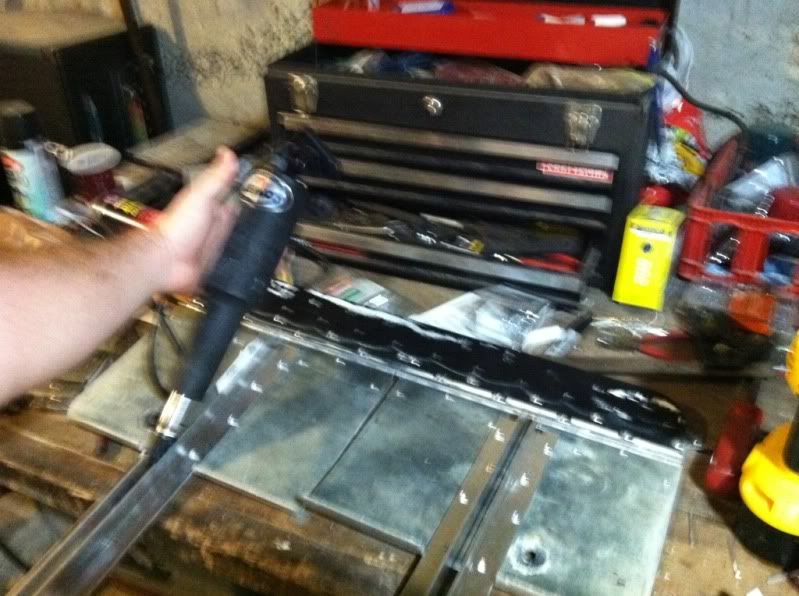
I left the extensions very long, and figured I'd mock it all up on the boat, and then cut them to size. This was part of the "measure 15 times, measure twice more, then cut" strategy I used on this project. Basically, I am deathly afraid of poking holes in my boat in the wrong place, so I checked and re-checked fit a million times.
Eventually, I was happy with how things lined up, so I cut the extensions to length, shaped them a bit with a grinder to avoid some clearance issues with the ends of the actuators, and got the whole thing stuck back on the boat and wired up.
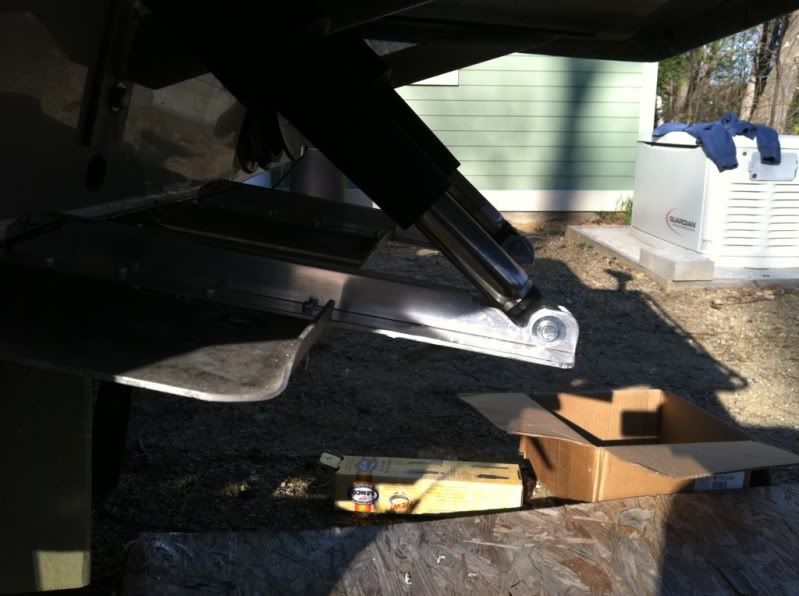
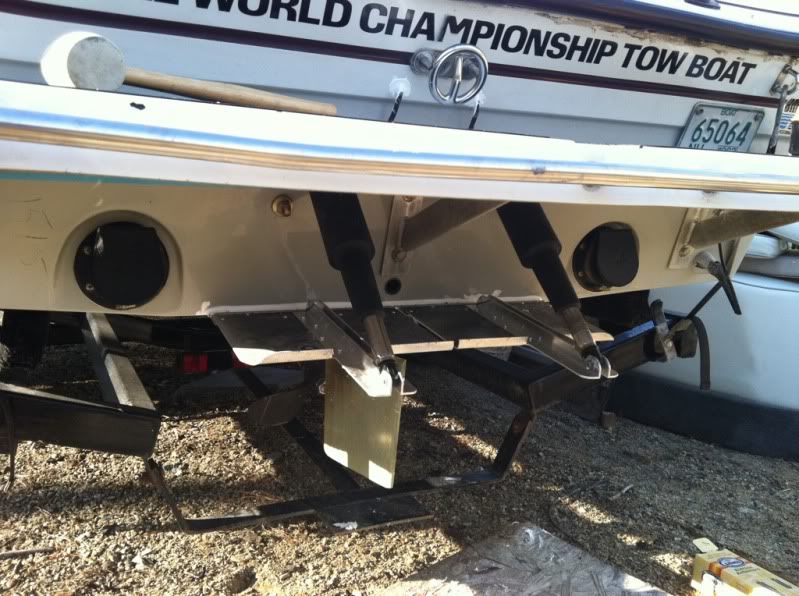
I kind of like how the switches came out as well:
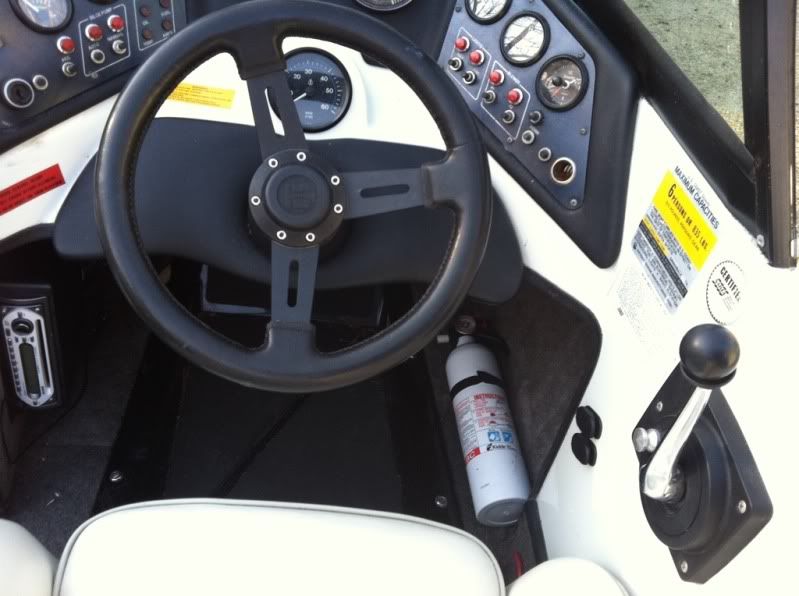
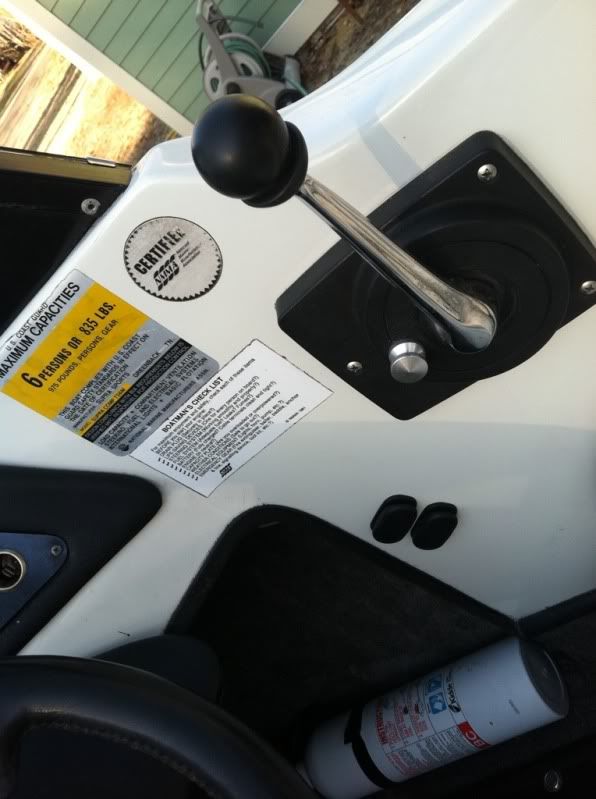
An interesting note about the switches: What I needed was 2 polarity-reversing switches, since each actuator is just a dc motor. I spent a few minutes looking for such a thing before finding out that with a little cleverness, you can turn any DPDT switch into a polarity reversing switch. I liked this solution a lot (about halfway down the page:
Robotics INDIA
And finally, here's a video of them in action:

Anyway, the point of it is that if you bend it down, it pushes the back of the boat up, and makes the wake small for slalom skiing. If you bend it up, it pulls the back of the boat down and makes the wake big(er) for wakeboarding. I mostly wakeboard, so I generally leave it in the up position. The problem is, pulling the back of the boat down makes it unstable at speed. So around 30 mph it starts to porpoise pretty noticeably, and by 35 it's getting pretty rough. At 40 it's way bad, and pretty dangerous. So I never went much above 35mph last year.
This year I wanted the best of both worlds, so I bought some used lenco trim tab actuators off of ebay and set about figuring out a way to fit them. The actuators look like this:

Some problems presented themselves:
1: there is no hinge, and the power actuators have more travel than the stock manual adjusters. I was worried about stressing the plate mounting point.
2: there are 2 adjusters. Keeping them adjusted evenly in a manual setup isn't a problem, but with the power actuators, I was worried that due to the actuators running at slightly different speeds, even if I wired them to one switch, they might end up offset, and twist the plate, again stressing the mounting point. Also, having some independent side-to-side adjustment might mean i can trim the boat level despite uneven weight distribution, although the tabs will be very close together and near the center line, so this may not really work.
3: the power actuators are too long. The manual ones are about 7" long in the middle of their travel, while the power ones are around a foot (i have the lengths written down somewhere). The manual adjusters already mount pretty near the edge of the plate, and the end that mounts to the boat can't be moved higher, because it would interfere with the swim platform. So there are some geometry problems to overcome. There are other length actuators available, but the ones I am using are the standard-length lenco ones. They're very common, and about as cheap and available as possible, which is key.
4: I can't really weld aluminum. I can weld steel, but the existing plate is aluminum, and I like the light weight and corrosion resistance, so I don't really want to go to steel.
5: money. I could have paid a boat shop about $600 or so in parts, and another $6-800 in labor to just do this whole project for me (for a total of around $1200-1400). But my budget was closer to $2-300 total. So that was out.
The plan:
After spending an afternoon under the boat with all the parts, just test fitting things, holding things up where they might go, and generally puzzling things out, I figured that the only real way to make it work was to make some sort of extension arm to mount the actuators to. Here is a terrible paint drawing of what I'm talking about:

The plate is red. the old manual adjusters are green. the new power ones are purple, as are the proposed "extensions". The 2 major problems I foresee with this solution are 1: that the extensions will basically be dragging in the water, and they may create a lot of spray. And 2: that the geometry isn't ideal. Making the angle where the extension meets the actuator more acute puts more load on the actuator for any given pressure on the tab itself. I did no math, but I have seen these tabs on much larger boats than mine, so I am hoping they can handle it.
Finally, the fun part: Construction!
I pulled the plate off and cut it into 3 pieces:

then I added some aluminum hinges I actually scavenged off another part of the boat:


Then I picked up some aluminum angle bits at the local hardware store and made the extensions:

I decided to rivet everything together, because rivets are cheap, I can get them in aluminum to avoid corrosion issues, they have small heads which makes mounting the plate back on the boat simpler, and it seemed like a good idea. So that's what I did.
Here are a couple more pics of the more-or-less finished setup on my bench:


I left the extensions very long, and figured I'd mock it all up on the boat, and then cut them to size. This was part of the "measure 15 times, measure twice more, then cut" strategy I used on this project. Basically, I am deathly afraid of poking holes in my boat in the wrong place, so I checked and re-checked fit a million times.
Eventually, I was happy with how things lined up, so I cut the extensions to length, shaped them a bit with a grinder to avoid some clearance issues with the ends of the actuators, and got the whole thing stuck back on the boat and wired up.


I kind of like how the switches came out as well:


An interesting note about the switches: What I needed was 2 polarity-reversing switches, since each actuator is just a dc motor. I spent a few minutes looking for such a thing before finding out that with a little cleverness, you can turn any DPDT switch into a polarity reversing switch. I liked this solution a lot (about halfway down the page:
Robotics INDIA
And finally, here's a video of them in action:
Subscribe to:
Comments (Atom)