Wednesday, December 26, 2012

Christmas Buoy Bell Wind Chimes

If you're a relative of mine, and you haven't seen me for Xmas yet, please don't read any further!!!


This year I am between jobs at christmas, and both my fiancee Sibyl and I have pretty big families whom we really like and want to get gifts for. Since I am out of work, I have a lot of time on my hands. So, we decided that we should find a gift we could make, something that could be a bigger time investment if the tradeoff was a lower cost. Since I'm sure people who received these will be reading this, I won't divulge what the ACTUAL materials cost was, but suffice to say we could pull it off. The idea started off as something I had been kicking around for a while. I know that a lot of Sibyl's relatives like wind chimes, and particularly rusty steel ones. I had seen a few triangular ones that I discovered are called "buoy bell" wind chimes, like this:
Link 1
Link 2

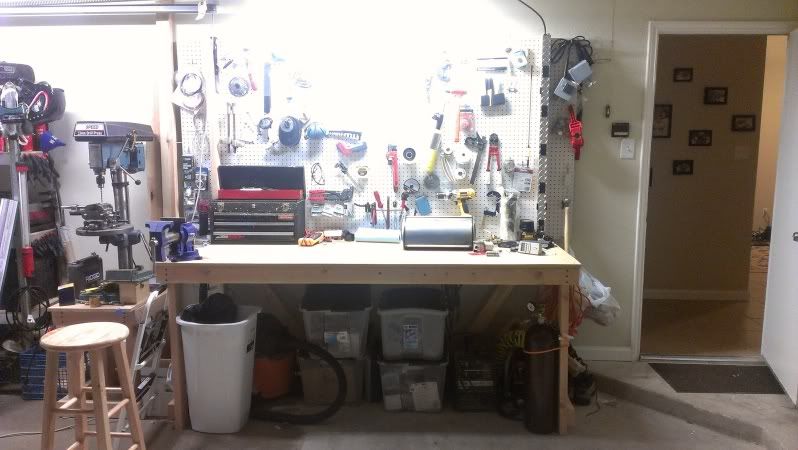
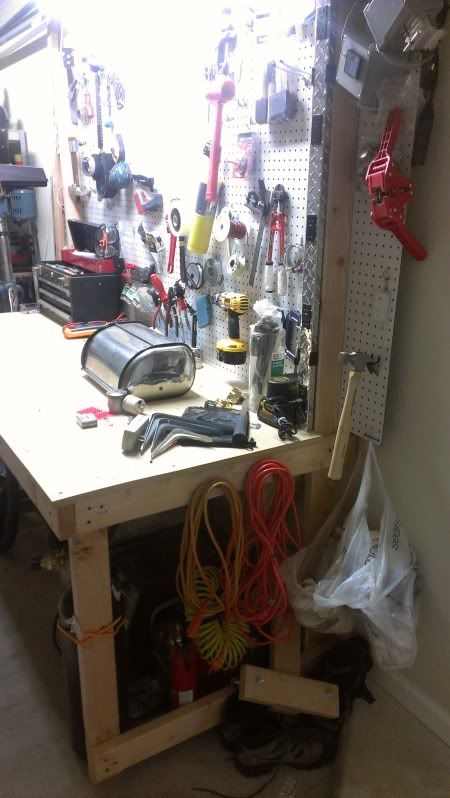
I like metalwork projects, and this seemed like a great chance to get the welder and plasma cutter out and do something fun. I lucked into a 4x8 sheet of 10 gauge steel on craigslist for pretty cheap, and the only other things we had to buy were paint for the dingly bits (from a local hobby store), rings, some thin chain, and some flat black and clear spraypaint from home depot. This is our garage workshop where we did most of the work (it's nice to be able to open up the garage doors for ventilation when doing this kind of thing):
Uploaded from the Photobucket Android App

First we mocked up one bell in cardboard and made sure we liked the proportions. Then we laid out all the triangles on the the steel:
Uploaded from the Photobucket Android App

Next we cut the triangles out with my plasma cutter. Here's a pic and video of Sibyl using the plasma cutter (yes, we usually wear better eye protection than what's in the video, but that tool also doesn't emit nearly as much dangerous light as the welder does):
Uploaded from the Photobucket Android App

Plasma Cutter Video

Once we got all the pieces cut out, we welded the triangles together. Here's Sibyl working on that step:
Uploaded from the Photobucket Android App

Welding Video

The next step was to cut a bit of chain, hammer on a "hammer", the part that hits the sides to make the sound, and weld the chain and ring to the apex of the bell. After that, they all got an overnight bath in dilute muriatic acid, to remove the anti corrosive coating and to etch the metal so that over time it will rust to a nice patina: Uploaded from the Photobucket Android App

Next, we cut out all the wind catching dingly parts, customized for each recipient. Sibyl turned out to be a great hand with the plasma cutter free-handing the shapes. Afterwards, I cleaned them up with the grinder. Here is most of them just after their acid bath:
Uploaded from the Photobucket Android App

 Some required a little further assembly: Uploaded from the Photobucket Android App

I think we did a pretty good job of minimizing waste, overall. But we still ended up with an amusing pile of scrap: Uploaded from the Photobucket Android App

Some of the dingly bits we left in raw steel, but some didn't look super awesome that way, so we decided to paint them. That process was done with all enamel paints, to help avoid paint-incompatibility problems. The first step after the acid etch was to spray the shapes flat black: Uploaded from the Photobucket Android App

then Sibyl hand-painted the colors: Uploaded from the Photobucket Android App

Uploaded from the Photobucket Android App

Uploaded from the Photobucket Android App

And finally, after painting both sides and letting them dry, we sprayed them with a clear coat to help protect the paint from the sun and weather: Uploaded from the Photobucket Android App

The last step was to assemble them all. Here are a bunch of pictures of the more or less complete bells: Uploaded from the Photobucket Android App

Uploaded from the Photobucket Android App

Uploaded from the Photobucket Android App

Uploaded from the Photobucket Android App

Uploaded from the Photobucket Android App

Uploaded from the Photobucket Android App

Uploaded from the Photobucket Android App

Uploaded from the Photobucket Android App

Uploaded from the Photobucket Android App

Uploaded from the Photobucket Android App

Uploaded from the Photobucket Android App

Uploaded from the Photobucket Android App

Here they are all wrapped up and ready to go: Uploaded from the Photobucket Android App

and here's a video that shows you what they sound like:
Bell Video

Also, since both of our remaining grandparents live in assisted living facilities and don't really have a good place for these, we made them smaller steel texas thingies (yes, they are backwards in this photo, give me a break I only moved here in september :P ): Uploaded from the Photobucket Android App

So anyway, it was a super fun project. I did most of the straight line cutting, welding, and assembly, as well as the black and clear spray. Sibyl did most of the freehand cutting, and all of the hand paining. The original idea was mine, and Sibyl came up with all of the dingly shapes. It was a total team effort, and we had a great time working on it. And I only left the welding gas on overnight and drained the tank once! (it's shielding gas, so no explosion danger, but it does cost like $18 to get the tank refilled :| ) Merry Christmas and Happy Holidays everybody!

Thursday, November 8, 2012

Continued progress...

Some more smoker progress.  Got the SD card and RTC integrated into the main board and off of 3rd-party modules, which is cool.

Uploaded from the Photobucket Android App

Uploaded from the Photobucket Android App

The board is 2-layer as well, which is something I'm slowly getting better at.

Tuesday, October 23, 2012

Smoker Progress

Making some good progress with the smoker controller:

Uploaded from the Photobucket Android App

Got rid of all that mess of wires and etched my first functional PCB.  Next step is to start integrating some of the plug-in modules to the main board, so that I am not totally dependent on parts from hobby-level manufacturers like SEEED studios and Adafruit (both of which I totally love, by the way).

http://www.seeedstudio.com/depot/
http://www.adafruit.com/

I think the memory card module and the real time clock will be my the first to go, mostly because they don't rely on any small surface mount parts (I can't seem to find thermocouple amplifiers in a through-hole package).

Thursday, October 18, 2012

Etched my first PCB today!  There are some design screwups, and I'm still waiting for a few parts before I can do much with it, but I was pretty thrilled with how well this came out, for my first attempt:

Uploaded from the Photobucket Android App

Thursday, October 11, 2012

Fancier smoker controller

Well, I've wanted to build an arduino (or other microcontroller) based smoker brain for a while, for a couple of reasons.  The biggest one is that with software behind it, I can add features as I work them out.

So I got started today, with basic PID control, dual thermocouples to monitor grate temp and meat temp, datalogging onto an SD card, and an automatic switch to "keep warm" temperature when the target meat temp is reached.

Other things I'd like to add are delay start and maybe wifi.  Delay start shouldn't be too bad, since there is a real time clock in the current setup to give me nice dates and times for the logged data.  The wifi part is a bit more complicated, because I am using pretty much all the available GPIO pins already.

Anyway, here are some pictures of the process so far:

Breadboarding it all out:
Uploaded from the Photobucket Android App
Starting at the upper left corner and moving clockwise there is the arduino board with seeed studios SD card board attached to it.  Next is an adafruit real time clock breakout board followed by a pair of adafruit thermocouple amplifiers.  Below those are the 2 pots I am using to set the cook temp and the meat target temp.  To the lower right is the solid state relay that (once it has it's heat sink) will switch the AC power to the heating elements.  Finally to the lower left is a sparkfun 20x4 backlit LCD.

Next step was moving it all off the breadboard.
Uploaded from the Photobucket Android App
I still haven't taken the plunge and learned how to etch my own boards, so I made a mess of wires, connectors, and screw terminals.  Hot glue holds most of it together.  I also cut up a "screwshield" to get decent screw terminals on the arduino itself.

Then I started laying out the enclosure.
Uploaded from the Photobucket Android App

And fitting everything inside the box.
Uploaded from the Photobucket Android App

Here's a mostly-finished look at the front cover.
Uploaded from the Photobucket Android App
The little yellow LED indicates when the elements are getting power.  The silver base of the solid state relay will eventually be covered by a heatsink.

Wider view of the box, with the thermocouple and power cable entries.  These will get some silicone eventually to help seal the box up a bit.
Uploaded from the Photobucket Android App

Not a very good picture, but this slot allows access to the USB port for programming, power for the low voltage parts, and (you can't see it) access to the SD card.  I'd like to come up with a simple plug or cover for this opening.
Uploaded from the Photobucket Android App

So that's where it stands at the moment, and it's getting late so I'll pick up on it and try to finish things up in the next couple of days.

Monday, September 17, 2012

New Workbench

Well, I moved to Texas recently, and I finally have a garage!  It's a great work area, but it sorely needed a bench.  So while my Dad was down visiting and helping me get moved in, we spent a couple hours whipping one up.  It came together great, and I'm thrilled with it already.

It was based loosely on this design:


This is how it came out:

Uploaded from the Photobucket Android App

Uploaded from the Photobucket Android App

Uploaded from the Photobucket Android App


Sorry for the washed out pics, I hung some overhead florescent lights, and combined with the reflective white pegboard they make for awesome task lighting.  Not so great for photos though.

Hockey!

I know it doesn't really fit the theme of the blog, but my winter hockey team won the NESHL D league metro-boston championship over the winter, which was awesome. Great group of guys! Uploaded from the Photobucket iPhone App Uploaded from the Photobucket iPhone App Uploaded from the Photobucket iPhone App

and just in case nobody believes I was actually there, here's the line from my game-winning overtime playoff goal (yes, it was my only goal of the playoffs, but it was a big one!): Photobucket


D league hero right there :P

time lapse smoker brain building

here's a little time-lapse I made of me building 4 smoker brains for family members (it's added to the original smoker post as well)

Mandarin Juice!

Weird how being unemployed I seem to have all this time for low-cost projects... We have a big mandarin orange tree behind our house. I can't tell if the oranges are under ripe, or are just going to stay tart and green forever. So I picked about 40 of them (maybe 1/4 of what is on the tree) and juiced em! It's real tasty, but tart. Not bitter like grapefruits, but not as sweet as I would expect from ripe mandarins. I guess they aren't quite ready yet... Uploaded from the Photobucket Android App Uploaded from the Photobucket Android App Uploaded from the Photobucket Android App

Polishing Rocks

Got a bit behind on the blog... Here are a couple of updates! Polishing rocks! These are some septarian nodules (50-70 million year old cracked mud balls with calcite crystals grown into the cracks http://en.wikipedia.org/wiki/Concretion#Septarian_concretions) that I found in canada in college on a trip with the geology club. I had them cut on site, but never got around to polishing them to make them really look nice. before: Uploaded from the Photobucket Android App after: Uploaded from the Photobucket Android App side-by-side: Uploaded from the Photobucket Android App surface prep disk, rubbing compound, and polishing compound, all applied with a little air powered die grinder. Finished with 3 coats nice polymer car "wax and shine" stuff. I'm quite happy with how they came out. They're not perfect, but for a couple hours of work with stuff I had on hand, I think they look great.